What Is Liquid Screed Made From?
Flow screed has similar properties to concrete in that it is a mix of aggregates, cement and water. However, concrete is much coarser in texture since it is predominately used for strength. Screed uses a much finer aggregate because its primary purpose is to achieve that even, flat and smooth flooring surface. There are two types of liquid screed, cement-based screed or calcium sulphate screed. The latter is also known as anhydrite screed in which a binding agent of calcium sulphate is added in place of cement. When water is added a reaction occurs in which gypsum is then formed. This reaction will continue for approximately one week until the calcium sulphate is used up. Unlike traditional screed, liquid screed cannot be self-mixed and is delivered to your site ready-mixed.
What Are The Advantages Of Liquid Screed?
There are a great many benefits that are encouraging the industry to turn to using liquid flow screed. Below you’ll find an overview of the advantages but you can read more on this here>
- Firstly, it is rapid-20mins to lay 25m²/ onsite pouring of 2000m² per day
- Secondly, you save on costs in labour and time
- Next, you save on materials since it lays as thin as 35mm (of course materials can vary)
- It is incredibly effective working alongside underfloor heating and allows easy heat transfer
- It’s VERY level – no amount of experience can match the science of liquid levelling
- It is less susceptible to shrinking, therefore, needs fewer expansion joints
- It won’t curl, crack or warp
- It is known as the ‘green floor’ due to its eco-friendly credentials
- Finally, it is laitance free so you don’t need to sand the finished surface
How Much Does It Cost?
When costing your liquid screed project, it is important to begin with accurate measurements. Liquid Screed is not possible to mix yourself and will be delivered to site ready mixed. If you do not precisely measure your space you could find yourself with too much or too little screed. If you end up with not enough screed, firstly you’re under time pressure since once the screed has gone off, you cannot mix in more. Secondly, mixing batches can lead to irregularities and compromise the quality of your finished screed. If you order too much, disposing of additional solidified screed can be a real headache and cost you money. We would recommend having a ‘hippo bag’ to hand to collect any small amounts of excess screed. These bags will allow water to drain through therefore only collecting the screed itself.

Whilst costings can vary from product to product, liquid screed costs approximately £21.50* per m² however the more screed you are laying the cheaper the cost since you will not be paying part-load charges. This is how much the cost can reduce when pumping larger volumes.
- The typical liquid screed cost for 2000m² would be around £10/m²*
- For 100m² it would be in the region of £16/m²*
With liquid flow screed arriving pre-made, it is useful to find a local supplier to you. As we are based in Buckinghamshire a local company such as RB Liquid Screed or UK Screeds LTD would be a good suggestion.
*Prices correct as of May 2022.
Liquid Screed Vs Traditional Screed
Traditional dry screed has been widespread for many years and is a cost-effective but labour-intensive method of screeding. Dry screed is made up of sand and cement (3-5 parts aggregate to 1 part cement) and is mixed by hand. This mixture forms a thin concrete-like substance that clumps together when squeezed. It is then manually shovelled into place, levelled by a screeding bar or polyurethane float and finally sanded to remove laitance once dry. There is the upside of not relying on outside suppliers for your screed and screed pump when choosing the traditional method however statistics suggest it takes ten times longer not to mention the added drying times. With traditional screed being laid at around 50mm, it can take a minimum of 50 days to dry out before other tradesmen can continue with the project. One benefit of dry screed is that it is suitable for non-flat surfaces that require a gradient such as a wet room. Read more >
How Do I Lay Liquid Screed?
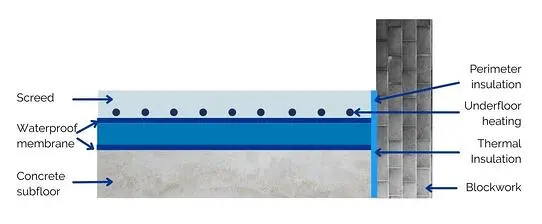
Firstly, as with many products, you should be working between temperatures of 5 and 30 since extreme temperatures will compromise the finish, affecting drying times and the strength of the product. Before beginning also remove dirt and debris. To prevent the screed from drying too quickly an SBR primer or liquid DPM (if grease is present) can be used to eliminate suction. As liquid screed is free-flowing, you should lay a watertight membrane such as a 1000guage polyethene sheet. Remember to curl up this protective membrane at the edges and stick it to the walls as well as keeping corner folds neat and taping any joins. Expansion foam can be used around the edges to allow for movement as the screed expands and contracts.
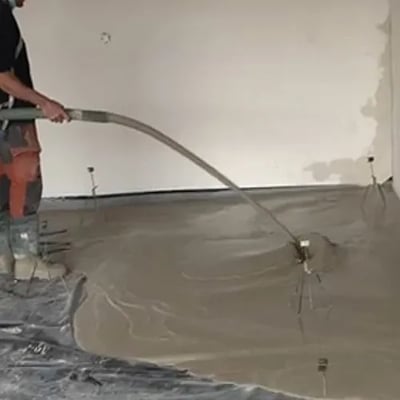
To achieve the correct level, use a laser level to enable you to set your screed levelling tripods to the correct height by moving the flat plate to the desired level. Once you have set all these elements up, you are ready to pour. Now it’s time for the machine to do the hard work and all you need to do is control the hose as it is pumped. Don’t forget those safety wellington boots as you’ll be wading through the screed. Once poured, you simply need to quickly tamp the liquid with a dapple bar to remove air bubbles and you’re done.
How Thick Should I Lay Liquid Floor Screed?
If you are bonding your liquid screed directly to the concrete subfloor, you should apply a primer to a clean surface. The minimum application would be around 25mm and a maximum of 80mm.
If you are using an unbonded method with a polythene membrane between the concrete base and the liquid screed, you would typically pour a thickness of 30mm (minimum) and no more than 80mm (maximum).
How Long Does Liquid Screed Take To Set?
One of the advantages of liquid screed is the fact it can take light traffic after 24-48 hours which is fantastic if you need to continue with a project. It is important to dry out your screed at a steady rate since it can crack if it dries too quickly. Products will vary and it is also important to consider the impact of weather on drying times. Generally, flooring can be laid as quickly as 7-14 days later and carpet approximately 3 weeks later. In comparison to traditional dry screed which takes a minimum of 50 days setting time, liquid screed really does have the edge.

Underfloor Heating And Liquid Screed
Liquid Screed and underfloor heating are perfectly compatible and from a customer’s perspective will save money in the long-term by reducing energy consumption. The reason for this is because the liquid screed flows to completely surround the heating elements ensuring there are absolutely no gaps. This makes for better heat distribution in which only the screed is heated and no energy is wasted heating the concrete subfloor beneath. Since liquid screed is poured as a much thinner layer than traditional screed (around 25-35mm), heat radiates more quickly and evenly, therefore reducing energy expenditure and ultimately saving money.
When you come to pour your liquid screed, ensure you secure the underfloor heating pipes inside the polyethene with clips every 400mm. It is also good practice to fill the pipes so they are not squeezed by the screed. It is important to follow these steps so that your pipes don’t float upwards when you are pouring.
Flooring Application
Once you’ve laid your flow screed floors, you may be wondering about the next steps and what flooring finishes are compatible. To be honest, just about any type of flooring can be laid on top of your cement-based flowing screed. From carpets to timber to laminate, ceramic tiles or vinyl, they all work well with liquid screed. Of course, there are a few top tips to remember before the decorative flooring goes down.
If your flooring requires adhesive, we would advise a light sand and the application of primer. This process will remove any laitance as well as seal the porous screed surface, therefore, preventing any moisture from the adhesive from seeping into the screed.
- Begin setting your underfloor heating at an ambient floor temperature (approximately 18 °C or the lowest manifold temperature)
- Maintain this temperature for 24 hours before raising it by 5°C per day until it reaches the optimum running temperature.
- Maintain this temperature for 7 days before reducing it by 5°C per day until you reach the starting temperature.
- Turn the system off and allow it to cool for 48 hours prior to moisture testing.
- Finally, ensure the heating is not switched back on until 14 days after floor installation.
Liquid Screed Machines
Liquid screed must be machine applied which has its benefits in saving you from back-breaking shovelling, levelling and sanding. A screed pump will ensure your material is thoroughly mixed to the correct consistency. It is tricky to achieve the same level of uniformity by hand plus of course, it saves time and energy in these manual intensive processes. Using a screed pump also allows greater accessibility, since your hoses will pump the material direct to the correct location rather than you shuttle running screed back and forth.
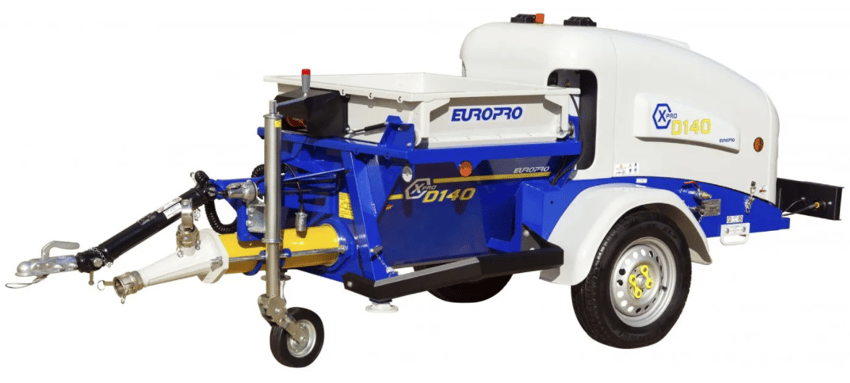
At CES we specialise in screed pump hire as well as offering flow screed pumps for sale. We stock a variety of screed pumps from brands such as Euromair and Putzmeister. If you’re searching for a compact electric pump to try out that new liquid screed, why not take a look at the Euromair MixPro 28. Alternatively, the Euromair X-PRO D140 is a heavier-duty diesel machine for those larger-scale projects. Our specialist team will be able to help you pin down the right pump for you and your project so why not give us a call. And when you’re ready to pump check out our tips for achieving great results with floor screed.
Our Popular Screed Machines
*Prices correct as of May 2022.
The Euromair X-Pro D140
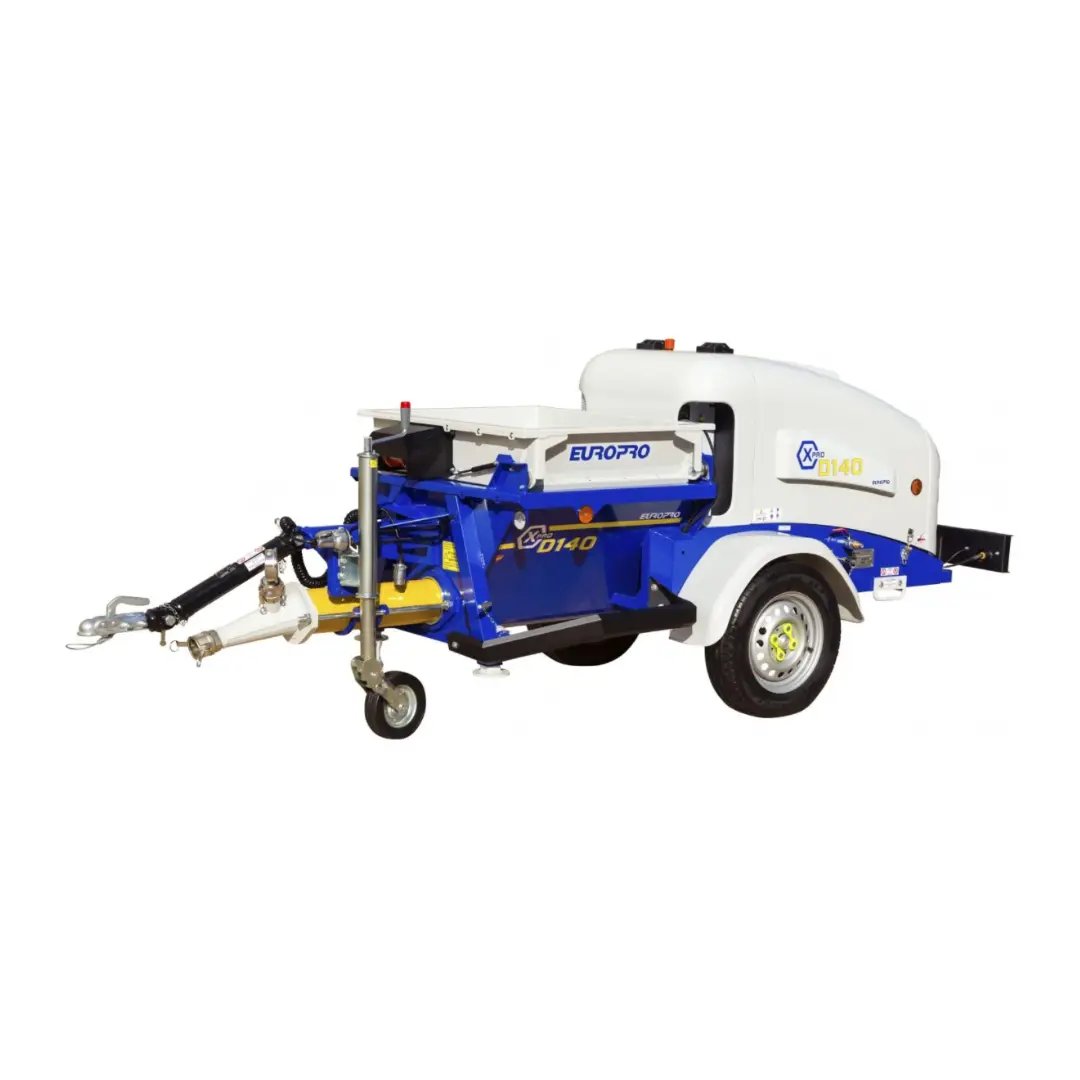
The popular Euromair X-Pro D140 is a worm pump for liquid floor screed application. This powerful diesel machine (4 cylinders Kohler 19kw engine) will pump up to 120m vertically and has a maximum output of 14m³ per hour (200litres per minute). It is designed with a vibrator fitted as standard to guarantee a continuous flow rate. This screed mixer pump is compatible with both calcium sulphate liquid flow (anhydrite) or cement self-levelling flow screed. The D140 has been optimised for simple maintenance and easy accessibility for servicing. Take a look at the D140 in action.
The Euromair MixPro 28
The Euromair MixPro 28, is a much smaller and extremely portable electric machine which is even manageable by one person. It pumps machine applicable floor screeds (as well as plaster and render). This flow screed pump operates at an output of 20 litres per minute and is built with a 70-litre capacity hopper. Whilst this machine is available for hire, one of the benefits of purchasing this machine is the 1 + 1 year warranty on offer for all Euromair machines. Head to our YouTube channel to see the MixPro 28 pumping Uzin Deep Fill pre bagged self levelling screed >
Flow Screed Pump Maintenance
In order for your screed mixer pump to continue performing at its best, it is imperative to follow manufacturers guidelines on machine maintenance and servicing. This includes taking care to clean your machine thoroughly after use, regular maintenance and booking in those all-important services. At CES we will service your liquid screed pump whether you bought from us or elsewhere. With our screed pump services, we recommend you book in your first oil change after your machine has clocked up 50 hours and then book in your machine for a service every 150 hours after that (e.g. 200hrs, 350hrs, 500hrs…you get the idea)
When it comes to daily maintenance of your flow screed pump, cleaning is your first port of call. Below is the procedure we would follow when cleaning out Euromair X-Pro D140 screed pump:
- Empty the hopper of screed. Remove the drain ball to allow wash out of the remaining product with water and allow it to drain from the hopper. Replace the drain ball once the hopper is clean.
- Ensure the machine is NOT under pressure, then disconnect the product hose. Fill the hopper with clean water, feel free to add some washing up liquid to preserve the life of your rotor and stator.
- Put the machine into pumping mode to clean the rotor and stator.
- Place your sponge ball in the product outlet and reconnect the hose. Read more >
Visual checks prior to using your screed pump are also essential to keep everything in full working order. A visual inspection should be a quick look over the machine, particularly focusing on the wear parts (flexible drive coupling, rotor and stator, cardan shaft, hopper seals) and the fuel levels (diesel, engine, coolant and hydraulic levels). For a more in-depth list of checks take a look here >
Contact CES Hire
If you have any further questions about liquid screed, feel free to get in touch and ask away! Our friendly team of experts would be more than happy to help you.
You can get in touch via our contact us form, send us an email, or call us on 01494 715472.

