What is the Difference Between Plastering & Rendering?
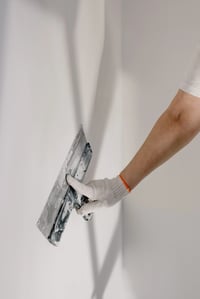
Rendering and plastering can often be confused since they are both construction terms for coating a surface or wall. To put it simply, rendering is overlaying an external wall with cement-based (or similar) material whereas plastering is lining internal walls with a comparable cement-like material. Whilst the substance is similar in its composition (both are often cement-based), plastering uses a much finer aggregate/sand to achieve an ultra-smooth finish which is desirable for decorative finishes inside the home. Render is made up of a heavier composition and more coarse aggregate in order to create a durable finish and protective outer layer for a property.
Read more about the difference between the two processes here >
What are the Benefits of Rendering?
Rendering not only looks stylish and is a quick way to update your home but it also provides many practical benefits too.
- Render offers a protective barrier to further strengthen the structure and preserve the brickwork on your property
- In variable climates such as the UK, render’s weather and water-resistant qualities are a brilliant solution to shield your home from harsh weathers, particularly if you live in coastal or exposed areas.
- Render forms a layer that will regulate the temperature within your home and ensure it is more energy efficient.
- Render can add value to your home as a sleek and stylish finish for your home.
- It is available in a range of often 30-50 colours when using through-coloured render meaning no subsequent painting.
- It can be adapted to a variety of finishes such as a contemporary scraped finish, a more characteristic roughcast look or even intricate ashlar cut designs.
What is Render made from?
Traditional render would have been made from a combination of lime, water and an aggregate such as sand. This formulation is still used when sympathetically renovating listed properties or perhaps trying to achieve the ‘rustic charm’ of that sixteenth century cottage for a modern construction. However, render is now more commonly cement-based though more modern formulas are being developed all the time including cement-free materials such as silicone or acrylic renders.

Hand application vs Machine Application
The hawk and trowel method of rendering is a familiar image that has been around for centuries and is a well-honed skill or craft. Hand application is a cheaper method of rendering since it only relies on a select set of tools (find out more about key rendering tools here). When rendering a small area, hand application is preferable over setting up and cleaning out a larger machine. However whilst cheaper in the kit needed, the labour costs may be more as it is a labour-intensive as well as physically intensive process. With hand-applied plaster, you will need several coats not forgetting the all-important curing time in between. There is further pressure added to manually complete a layer on the same day to ensure even colouring.
More Pros and cons for rendering methods can be found here >
Spray render machines are becoming increasingly popular in the UK having initially been a more European method of working. First and foremost we must mention the health benefits since operating a render spray gun is less physically demanding. As well as reducing the strain, machine application reduces the time spent on a project as spraying render can be completed in a fraction of the time. This will increase your productivity across a year enabling you to accept more jobs including perhaps more ambitious projects too. Working with a pressurised spray gun will create a uniform and even finish.
There is of course the consideration of the initial outlay of the machine which is somewhat more than the cost of a hawk and trowel as well as ongoing maintenance and safe storage costs. However there are always options to suit all since small electric machines can be purchased for far less than a big diesel unit. It is also well worth considering second- hand machines or perhaps beginning your machine application journey by hiring a machine instead. Don’t forget, when it comes to machine hire, make sure you plan ahead as the most popular machines may not be available during the busier spring/summer period. Whilst a machine can feel like a big decision and investment, it will absolutely pay you back in the amount and quality of the projects completed.
Discuss Your Requirements With CES Hire
Our expert team is on hand to help you with any queries you have. Whether you:
Have a question about one of our products
Want to find out more about our maintenance services
Or simply need some advice
The CES Hire team can help! All you need to do is fill in the form provided and we will be in touch as soon as possible.
CES Machine Recommendations
If you are keen to make the switch to machine applied render then we are here to help. We have a range of rendering machines available both for hire and purchase. Why not try before you buy and hire a machine you are interested in?
One of our popular Electric machines for machine application is the Euromar MixPro 28. This rendering machine is incredibly convenient on site as it is compact and designed with wheels to enable it to be transported by just one person. Even though it is small, it will still hold up to 70 litres in the hopper and can pump up to 30 litres of render per minute when fitted with an alternative stator.
If you’re completing larger projects then look no further than the diesel Euromair X-Pro D80. The D80 is a powerful batch mixer pump and sprayer with a built in compressor designed in one road-towable unit. This machine will cope with sizable projects with its 200 litre hopper and variable flow-rate output of up to 60litres per minute.
Best-Selling Rendering Machines
*Prices correct as of July 2022.
Spray Render Demos
What better way to get to know a rendering machine than to attend a Demo Day. CES frequently holds demo days in partnership with render manufacturers so look out for information via our social platforms. We also archive footage from these events over on our YouTube Channel so you can watch videos of our machines spraying a variety of render brands. Don’t forget, when you buy a rendering machine, we will offer a machine set up and trial at our Buckinghamshire Headquarters as part of the service.
CES also have a great relationship with Weber and have previously partnered with them to spray Weber Pral M using our Euromair CP30 and Silicone-based Webersil TFspraying with the Euromair DropPro 8.
Render Finishes
As well as considering the type of render to use, there are a variety of options for finishing your render. All types of render will have the same benefits of creating the additional protective, weather-proof and insulating layer which will preserve the structural brick or blockwork of the house. Render finishes are more of a personal choice of taste as well as taking into account the period and style of the original house and what may complement it. Render can be finished in a variety of ways including a contemporary scraped finish, a more characteristic textured roughcast or for even more texture why not consider pebbledash. Not forgetting of course the option of intricate ashlar cut designs. Here is a little run down on some of those options:
- Scraped Finish:
As the name suggested this finish is scraped or scratched back to achieve a smooth pitted finish. The crisp clean finish creates a fresh modern look.
Find out more about how to achieve a scraped finish here >
- Roughcast Finish:
It is important to be sympathetic to the property you are rendering therefore roughcast can be a great choice for an older style property. Also called wet-dash, roughcast creates a textured finish though a little softer than pebbledash since the aggregate is mixed into the render pre-application to achieve a single coloured textured appearance. Read more>
- Pebbledash Finish:
Pebbledash was particularly popular in the post-war housing boom. It is a fantastic finish in coastal or exposed areas since the coarse texture provides further protection from the elements. Pebbledash or dry-dash is a method of render finish in which an array of pebbles/small stones/fragments are thrown at wet render and pressed in whilst wet. The aggregate distributed across the wall can be completely bespoke and in fact modern decorative aggregates can create a beautiful unique façade. Read more >
What is Monocouche?
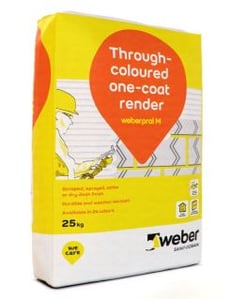
If you are in the industry you will most certainly have heard of monocouche. It derives from the French meaning ‘single layer’ and does exactly that, it is a single/one-coat render. Whilst popular in Europe for many years, it is now seeing a surge in popularity in the UK. Monocouche comes in ready-mix 25kg bags to which you simply add water. These bags can cost between £10-£25* depending on the brand (*prices correct as of July 2022). Monocouche is applied in a single pass of 18mm and scratched back to 15mm. This is of course a standard monocouche rule of thumb however there will be variations, for example in more exposed climates monocouche can be applied up to 25mm. There are a great deal of benefits to selecting a monocouche render including:
- Quick application which no need to wait for curing of multiple layers
- Quick curing times
- It is available in pre-coloured render therefore you do not need to paint it
- It is incredibly durable lasting at least 25years without any real maintenance
- It’s a fantastic insulating layer ensuring energy efficiency within the property
5 Sprayable Monocouche Renders
Monocouche or one-coat render is an increasingly popular choice with renderers. It saves a great deal of time since there is no need to wait for individual coats to dry and the result is a contemporary, durable and energy efficient finish. There are many brands of sprayable monocouche render available, below you’ll find some of the popular render manufacturers and their core machine-sprayable monocouche products.
Find out more about these render companies and their products >
- Weber Pral M - A popular one-coat through-coloured render achieving a scraped or roughcast finish. It can be applied over brick or block-work and has 24 colour options.
- K-rend KMono - KMono came onto the scene in 2022 as a premium machine sprayable monocouche that has been specially optimised for machine application. Available in 20 colours, this material is a cost-effective, labour-saving render.
- Parex Monorex GM - A popular monocouche that can be finished medium scraped, light tyrolean or heavy roughcast. Available in 48 colours.
- EcoRend MR1 Monocouche - MR1 achieves an attractive stone-looking finish in 33 colours. This high-performance cement-based monocouche scratch render has been designed with superb water repellency, breathability and ultimate adhesion. This through-coloured one-coat product provides a low-maintenance solution for your property.
- VPI Monocal GM/GF - This through-coloured render is available in 58 colours and can create a medium scraped or roughcast finish when opting for GM version or a modern fine finish with the GF option.
Key Tools for Rendering
Whether you are hand or machine applying your render, CES stock specialist tools to ensure your render boasts the perfect finish. With traditional hand application a good hawk and trowel are key for the application process. When purchasing a trowel look for a stainless steel version that will be strong enough to cope with weighty render yet durable to stand the test of time. You’ll be using this tool frequently if hand-applying as this tool essentially spreads the render over the surface so it is important that it is light-weight and comfortable. With machine application it is important to kit yourself out with the best tools for scraping back and smoothing over to create a flat, even finish.
Check out our blog which gives you the ultimate guide to finishing off your render >
Below are some essential tools for achieving that crisp finish:
A Whistle-Stop Tour of the Machine Rendering Process
With rendering there is never a one-size-fits-all approach since your method may change according to the machine, material and project. However we have put together a very brief guide to the machine rendering process:

Preparation: Stress Points
You should apply mesh cloth around windows/opening. Firstly, skim on 2/3mm of your render (never place the mesh directly onto blockwork as it serves no purpose), then embed the mesh. The mesh should span the entire window plus 400mm on either side (top and bottom of the opening and around the apex of the windowsill). This process can be done in advance and scratched to leave a rough key or it can be done the morning of spraying.

Preparation: Beads
The recommendation is to place an expansion every 7 linear metres for blockwork and every 6 metres for brickwork.
Adhesively fix the beads ensuring you do not follow the blockwork.
With the return corners, expose the bead 5-6mm on each side to achieve 11mm on the corner edge.

Spray
Once the machine is fired up, it can take a couple of minutes for the product to reach the gun and it is worth spraying into a spare bucket before spraying the wall.
Start by filling the beads then move steadily from side to side keeping the spray gun at a consistent distance from the wall. Overlap each line so the render is joined together and less air is trapped in the render.

Flatten
Using a serrated rule (toothed works better than a straight edge with monocouche), sweep over the render to flatten.
This will remove air pockets and help you reach the desired smooth finish.
Use excess render to fill in the slacks and ensure the beads are well bedded in.


Scrape
In optimum temperatures (14 degrees), your monocouche will be ready to scrape approximately 5 hours later (in cooler temperatures you will need to leave it longer).
Use an I-Bar to scrape using your body to press against the surface.
Check the wall is level using the flat edge of the I-Bar.

Scratch
Using a Render scratcher tool, scratch from the top down moving in circular movements.
There should be nothing sticking to your scratcher.
If you notice pinholes in the render simply press some excess dried render into a ball and push into the hole in the wall.

Finish
Always remember to brush down your wall to remove residue from your scrape. Use a soft brush to brush away loose aggregate. Brush both horizontally and vertically. Avoiding this step nearly always leads to customer complaints when they call to moan that the render is falling off the wall! Of course, it isn’t falling off but nevertheless not a step to skip when you’re that close to finishing.
How Weather Affects Rendering
UK weather can be a little all over the place and now more than ever with global warming, we are experiencing extremes in weather conditions. Ideally render would be applied in temperatures between 5-25℃ with no wind, rain, snow, frost or extreme humidity; sounds pretty impossibly hey? You certainly can’t sit around and wait for the perfect rendering conditions so it’s best to check the forecast, assess your product's limitations and plan for the weather.
Extreme heat causes your render to dry too quickly which can lead to cracking and a patchy appearance. If rendering on a particularly hot day consider these adjustments to ensure your render is perfect.
- Be flexible with your schedule which may mean starting rendering before the sun has fully risen
- Work with the sun to ensure you are working in the shade throughout the day
- Put up covers to create more shade
- Apply a primer to prevent the substrate from drawing moisture out of the render
- Apply a fiberglass mesh to increase strength and prevent cracking
- Check out more tips here

Cold weather can also cause problems as you may find your render doesn’t cure quickly enough and retains moisture. Lime Bloom (a thin white film) can also occur when your render is exposed to damp or low temperatures at an early curing stage. Frost can create issues since the water in the render may crystalize. The expanding and contracting nature of ice in extreme cold can also cause cracks in render to worsen. At CES we highly recommend using a Render Accelerator (a liquid additive) which mimics the render conditions of a 20℃ day and therefore ensures your render cures at the appropriate speed.
Do I need Planning Permission to Render?
Planning permission restricts the alterations you can make to your home without prior consent. With Permitted Development Rights also being added to the mix in May 2019 it is perhaps a bit of a confusing grey area when it comes to rendering your property. Essentially you do not need Planning Permission if you are using materials similar to that of the original house construction. Permission for rendering should be sought if:
- Your property is listed
- You live in a conservation area (e.g. a national park or area of outstanding beauty)
- The materials don’t match the original house construction. Read more >
If you are unsure, it is always best to seek advice. Planning Portal is a great tool to use to find relevant advice for your specific location and situation.
How to Maintain your Rendering Machine?
In order to keep your machine in the best possible condition and working at optimum levels, it is crucial to keep up with machine maintenance. This means doing those daily visual checks before you spray, keeping your machine clean and booking in regular services.
Read More >

Visual Checks

Cleaning

Servicing
Visual Checks
Daily checks need only take 5-10minutes before firing up your machine and they will look different for each machine. The key things you will be looking for...
|
On an electrical machine are:
|
On a Diesel machine are:
|
Cleaning
Keeping your machine clean will not only improve the image of your company on a professional level but it will also keep your machine running smoothly and prevent unnecessary strain. Important machine parts to concentrate on could be
- Mixing chamber
- Material Hopper
- Delivery Hose
- Spray Gun
- Exterior Body Work
Servicing
Finally, servicing your machine with a reputable company on a regular basis will really prolong the life of your rendering machine. CES offer a range of servicing packages and are more than happy to service your machine even if it wasn’t bought from us. With a diesel machine, we recommend booking your first oil change after 50 hours followed by a full service every 150 hours. Always refer to your machine manual for specific guidance on how often to service your machine.
How to Repair Render?
As soon as you notice a crack, a bulge or blown areas, get it seen to as it will only deteriorate, cause more damage and cost you more to repair.
Assessing The Damage
Damaged render can come in the several forms:
- Cracks (large or hairline)
- Bulging areas
- Blown render (this means hollow render when it no longer adheres to the substrate behind)
- Render that has completely fallen off and exposed the brickwork behind.
Any of these symptoms should be dealt with straight away. With new builds or extensions, you will find settlement cracks can appear and as the wall behind moves so will the render. Winter is not render’s favourite season since if you already have cracks in your render they can develop with frosty/icy conditions. When moisture seeps into cracks it can freeze and expand, worsening the crack. If the damp/water becomes trapped between the render and wall it can then blow the render loose. Once moisture and damp have entered, it can also penetrate in the solid walls and brickwork causing further complications. Also be aware when you mix your render that the material is not too strong since this can lead to shrinkage and subsequent cracks.
Hairline Cracks
These are the steps you should follow to repair a hairline crack:
- Thoroughly clean the area and allow 48hours of drying time
- Using a mini disc cutter or oscillating tool, run a cut through the crack to slightly increase the width
- Mix (for example) weberpral M with weber accelerateur monocouche at a dose of 100ml per 25kg bag.
Then mix in a dilution of 2 parts clean water with 1 part EVA or waterproof external grade PVA.
Ensure an exact ratio to keep the colour correct - Use a cartridge gun to apply the mix, cutting the nozzle to match the width of the crack.
Read more >
A Guide to Rendering Costs
There is no clear-cut single answer to the question "how much does rendering cost?" When considering costs for rendering your home there are many factors to bear in mind. It is also advised not to cut corners and attempt a DIY job; rendering is a skill that is best left to the professionals. A poorly executed rendering job can simply lead to further costs as cracks, bubbles and mould can appear.
Render Costs
The render itself will be a large chunk of your budget and this can vary according to
- The size and difficulty of the property
- The method used to render
- The type and brand of render you choose
The following grid gives you a rough guide to the varying costs for the type of brand according to property size:

| Type Of Render | Cost Per m² | Bungalow (100m²) | Semi-Detached (200m²) | Detached (300m²) |
| Lime | £20 | £2000 | £4000 | £6000 |
| Cement | £10 | £1000 | £2000 | £3000 |
| Pebbledash | £30 | £3000 | £6000 | £9000 |
| Polymer | £30 | £3000 | £6000 | £9000 |
| Acrylic | £30 | £3000 | £6000 | £9000 |
| Monocouche | £35 | £3500 | £7000 | £10500 |
| Paint | £10 | £1000 | £2000 | £3000 |
Prices correct as of July 2022*
Don’t forget this is purely the material costs and you will also need to factor in labour costs and consider the method of application hand or machine applied. For more on this take a look here >
Contact CES Hire
If you have any further questions about rendering, feel free to get in touch and ask away! Our friendly team of experts would be more than happy to help you.
You can get in touch via our contact us form, send us an email, or call us on 01494 715472.


